Saturday 23 October 2010
Wednesday 20 October 2010
Theme 1 - Re creation of a Dave Willis portrait
I found a portrait by Dave Willis of Skin (Skunk Annansie lead singer) that I was drawn to in Steve Bavister's book, 'Lighting for portrait photography'.


The photo was produced using film that was cross processed with colour negative chemistry to boost the contrast. The image was produced using a single light with a soft box, placed directly in front of the subject. The highlights on her arms are the result of light bouncing off the ceiling and off the wall she is leaning on. Her dark skin accents this. What I find interesting is the use of a curved slopping background that produces a significant curving effect that is enhanced by the slight shadow cast upon it. The subject looks as though she is about to take off and has a determined expression in her face. The tone of her skin has produced startling contrast against the white background. The use of the black and white clothing has also exaggerated this, producing a dramatic effect. The trousers are super wide and cover the shoes so that the subject's feet nearly vanish into the floor. The image looks over exposed as the contrast has been boosted post production. The following lighting plan was used:


Dave Willis is a photographer who shoots portraits, fashion and music stars. The image below is that of Sharon Osborn:

This image portrays Sharon a strong and powerful figure as she is positioned sitting at the head of the table, clasping her hands. It looks as though the photographer has used a spot light on her face and body to make her stand out of the background and become the main focal point of the picture. The background is out of focus and is framed by the use of the curtain, surrounding the window. The window provides a 'grid like' effect with a series of squares and there is a soft reflection of light cast on the highly polished wooden table.
The position of the camera is slightly below eye level that reinforces the appearance of dominance. Sharon has also been dressed in a shirt, jacket and tie, which again, adds to the effect. Once seen, the viewer of this picture is left with the impression that the subject is a dominant figure who is strong willed and in control, very much like Sharon Osborn!
The following picture portrays a nearly angelic image:

This is a taken from a fashion shoot.
The model is topless, however, the positioning of her body has produced a tasteful and evocative image. the main focal point is her back and shoulders. The light has created subtile tones on her skin and the 'garment' is loosely draped over her shoulders. The image is tightly cropped as the model takes up the majority of the frame. Her pose draws the eye to the shape of her body as the light has created highlights on the front of her chest without being obvious.
'Skin portrait'
The photo was produced using film that was cross processed with colour negative chemistry to boost the contrast. The image was produced using a single light with a soft box, placed directly in front of the subject. The highlights on her arms are the result of light bouncing off the ceiling and off the wall she is leaning on. Her dark skin accents this. What I find interesting is the use of a curved slopping background that produces a significant curving effect that is enhanced by the slight shadow cast upon it. The subject looks as though she is about to take off and has a determined expression in her face. The tone of her skin has produced startling contrast against the white background. The use of the black and white clothing has also exaggerated this, producing a dramatic effect. The trousers are super wide and cover the shoes so that the subject's feet nearly vanish into the floor. The image looks over exposed as the contrast has been boosted post production. The following lighting plan was used:

The re-created image was shot at the college studio using the following equipment:
- Nikon 700
- Single Bowens flash head
- Large rectangular soft box
- Sekonic lightmeter
- Interfit IR trigger
- Fixed solid and curved backdrop
- Post production - lightroom 3 and photoshop CS5
The bowens head was attached to the ceiling by a extendable rig. This was moved in accordance with the health and safety requirements of the college (The rig was moved by the Tutor when required). The camera was securely fixed to the mobile stand, as instructed by the tutor.
Step 1 - set up

The image above picture shows the set up that was used to create the shot. The camera was positioned on the stand on the right hand side of the set which enable me to shoot at an otherwise impossible angle.
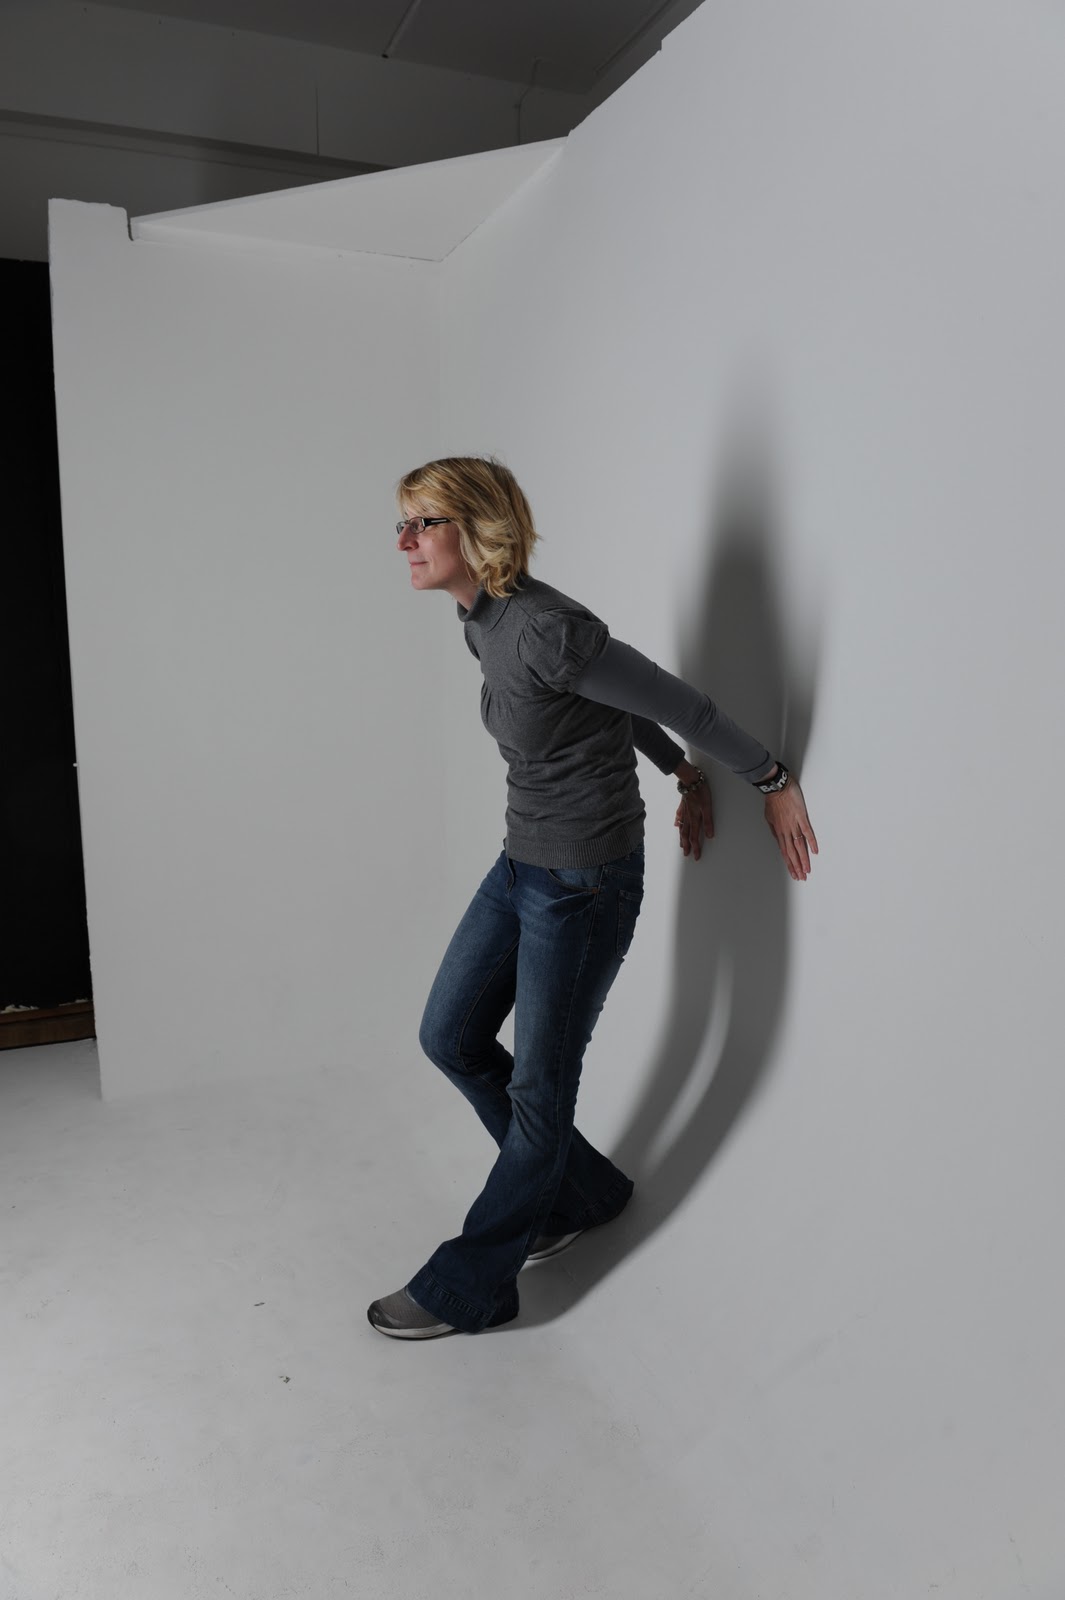
Step 2 - The addition of the model

Maggie very kindly offered to pose for me. I directed her to adopt the pose of the model in the original photograph. Once in a suitable pose, I metered her using my sekonic flash meter. The chosen camera settings for metering were a shutter speed of 1/60 and an ISO of 200. It took a number of measurements to get the desired image as the original image looks over exposed. The following images were taken to achieve the desired effect:


F 7.1 F 8.0 F 3.5
The final choice of aperture setting was f 3.5, because it produced the slightly over exposed effect that was essential for the picture.
Post production
The f 3.5 image was imported into photoshop, where I cloned in the white background to produce a seamless effect and added some noise using the addition of a filter:

I then used adjusted the curves to create the extreme over exposed look to match the original photo situated on the right of the screen:

The final image:

The original image:

Reflection:
There were obvious restrictions on what I could achieve with this project, the most obvious being the look of the model. My model had a significantly different look to that of 'Skin', however, what I have tried to do is re create the look of the picture that Dave Willis produced by using the correct lighting set up, correct use of equipment and the use of post production tools.
Because the model was different and I didn't have to option to use the same clothing, the size and shape of the shadow is different and my image doesn't have the startling 'burnt out' look with skin's trousers.
Wednesday 13 October 2010
Theme 1 - Great link to source research
I found this link really useful when staring to research my chosen photographers.
http://www.chrisbeetles.com/
http://www.chrisbeetles.com/
Saturday 9 October 2010
Theme 1 - Pic 2 - re-creation of Lemons and Limes

I quickly realised that I needed a black background, a lime and lemon and a single flash head. I have a set of interfit EXD 200 flash heads and kitted it out with the standard reflector. I arranged the set up as shown below:

I then chose my 50mm lens and did a light reading using my sekonic L385 light meter. I chose a 1/60 sec shutter, manual focus and an aperture of f5.6 in order to get most of the subject in focus, but the background out of focus. I shot the picture just above the level of the subject. It is shot in RAW to enable me to change the white balance and exposure in lightroom 3 if necessary and produced the following image:

In order to achieve this picture, I tweaked it in lightroom using the following process:


I feel that the resulting image does resemble the initial image. What I have learn't from this exercise is:
- How to create a softer cloning effect in photoshop by changing the cloning tool and changing the opacity.
- Where to position the key light to create the correct level and position of shadow.
Friday 8 October 2010
Theme 1 - Low-key photography
Low key photography
I have always prefered the more dramatic images of Low-key portraits than high-key as they seem to reveal more of the sitters personality and emotion. Below are a examples of low key photography:


During Photography class last week I tried in the studio to re- create this image with the help of Maggie. I like this image because it is very atmospheric and moody, I also underestimated how difficult it was going to be!


The metering was taken using an sekonic L-358 with a set ISO of 200 and shutter speed of 1/125. This recommended an aperature of f/4.0. I shot it using my Nikon D80 with a 50mm lens and used manual focus.
Reflection
Although I'm relatively happy with the final image, It doesn't quite replicate the image fully. It is also slightly out of focus and the background is not jet black as the light has 'spilled' over onto the floor of the studio. In the future to prevent this from happening I could use a heavy black cloth (velvet) on the floor inorder for the light to be fully absorbed. For a first attempt I'm quite pleased, but will try again and next time will use black cloth and focus on the subject before turning the lights off
I have always prefered the more dramatic images of Low-key portraits than high-key as they seem to reveal more of the sitters personality and emotion. Below are a examples of low key photography:


During Photography class last week I tried in the studio to re- create this image with the help of Maggie. I like this image because it is very atmospheric and moody, I also underestimated how difficult it was going to be!

The lighting set up was similar to this:

We used a single light with a honeycomb grid on the end to help direct the light.
'Like snoots and barndoors, a honeycomb grid ia an attachment that narrows and focuses the beam from a stobe lamp. The primary difference is that a honeycombe grid provides a smoother less dramatic graduation to the edge of the light. These grids come in four standard angles of beam widtht; ten, twenty, thirty, and forty degrees. The smaller the angle of beam width, the tighter the beam of light'. ('Digital photography and lighting' (2006) C.Jamieson and S.McCormick p.71)
The difficulty we had was where to place the key light. If we placed it at 45 degrees to the subject (as demonstrated in the diagram) the shadows were too severe and too much light landed on the models face. If we placed it slightly behind the model, we got a 'rimmed' effect that was not what we were after.
'Rim lighting is a technique used to give shape to objects in a photograph by backlighting the subject. When it is used in a subtle manner, rim lighting can be barely detectable. When rim lighting is used as an effect, it gives the subject a lighted halo around them and an ethereal look. Rim lighting is most often used to define shapes against a background, but it can also be used to highlight subtle effects of a photograph such as tiny hairs like those on the rim of a flower' (T Moergan (2009) eHow contri

The metering was taken using an sekonic L-358 with a set ISO of 200 and shutter speed of 1/125. This recommended an aperature of f/4.0. I shot it using my Nikon D80 with a 50mm lens and used manual focus.
Reflection
Although I'm relatively happy with the final image, It doesn't quite replicate the image fully. It is also slightly out of focus and the background is not jet black as the light has 'spilled' over onto the floor of the studio. In the future to prevent this from happening I could use a heavy black cloth (velvet) on the floor inorder for the light to be fully absorbed. For a first attempt I'm quite pleased, but will try again and next time will use black cloth and focus on the subject before turning the lights off
Saturday 2 October 2010
Statement of intent - Theme 1 portrait
Intentions/purpose of the photography to be undertaken
My intentions for the photography that I'm going to undertake in this course is a mixture of low-key, and high-key studio photography with some location pieces thrown in to provide some context to the subject.
Reasons for selecting 'Drag Queens'/'Drag king'
I have chosen, as a project, to focus on 'drag queens' or 'female impersonators' as I think that this is an original idea that has a number of creative possibilities. Drag queens traditionally are vivacious, extreme and outrageous, some portraits portray this stereotypical image of them. I would like to take more 'non-conventional' shots that portray a more emotional side.
The Photo imaging equipment and medium that I will be using and why
Camera - Nikon D80
Lens - 18-135mm and 50mm 1.4
Flash transmitter - IR
Studio lights/Equip - Prolinca 400 X2
Interfit EXD 200 X2
Bowens gemini
Coloured gels/Barn doors/Snoot/Honey comb
Soft boxes
Umbrellas/Shoot through/reflector
Reflectors
Sekonic light meter
Background -Lastolite Highlight/lowlight/grey
Variety of paperback grounds
Flash - SB800 speedlight
The purpose of using this equipment is to provide me with the maximum amount of creative flexibility in both the studio and on location in the clubs that I will be shooting to provide some background research to my studio work.
Techniques that will be used and how they will help convey the visual message
In the clubs, in order to provide me with the desired effect, I will adopt a more 'documentary' style with a series of 'reportage' shots that will portray natural unposed shots. In the studio I will position the subjects in a series of pre-arranged lighting set ups and poses to achieve the desired project outcomes.
How light quality will be applied and controlled to help convey the visual message
The type of light that will be used is a mixture of both natural light (on location) and studio light. The key thing to consider when taking shots in the clubs is the lighting rig set up to light the performance and who to adjust the flash setting to create the desired effects.
Risk and health and safety considerations
In the studio the health and safety considerations are easier to manage as the environment is more controlled. Practical issues, such as cable management and dealing with hot lights and attachments have to be considered. On location the environment is not so controlled, so an awareness of potential hazards is essential and need to be identified during pre-visit trips.
Subscribe to:
Posts (Atom)