
Dave Willis is a photographer who shoots portraits, fashion and music stars. The image below is that of Sharon Osborn:

This image portrays Sharon a strong and powerful figure as she is positioned sitting at the head of the table, clasping her hands. It looks as though the photographer has used a spot light on her face and body to make her stand out of the background and become the main focal point of the picture. The background is out of focus and is framed by the use of the curtain, surrounding the window. The window provides a 'grid like' effect with a series of squares and there is a soft reflection of light cast on the highly polished wooden table.
The position of the camera is slightly below eye level that reinforces the appearance of dominance. Sharon has also been dressed in a shirt, jacket and tie, which again, adds to the effect. Once seen, the viewer of this picture is left with the impression that the subject is a dominant figure who is strong willed and in control, very much like Sharon Osborn!
The following picture portrays a nearly angelic image:

This is a taken from a fashion shoot.
The model is topless, however, the positioning of her body has produced a tasteful and evocative image. the main focal point is her back and shoulders. The light has created subtile tones on her skin and the 'garment' is loosely draped over her shoulders. The image is tightly cropped as the model takes up the majority of the frame. Her pose draws the eye to the shape of her body as the light has created highlights on the front of her chest without being obvious.
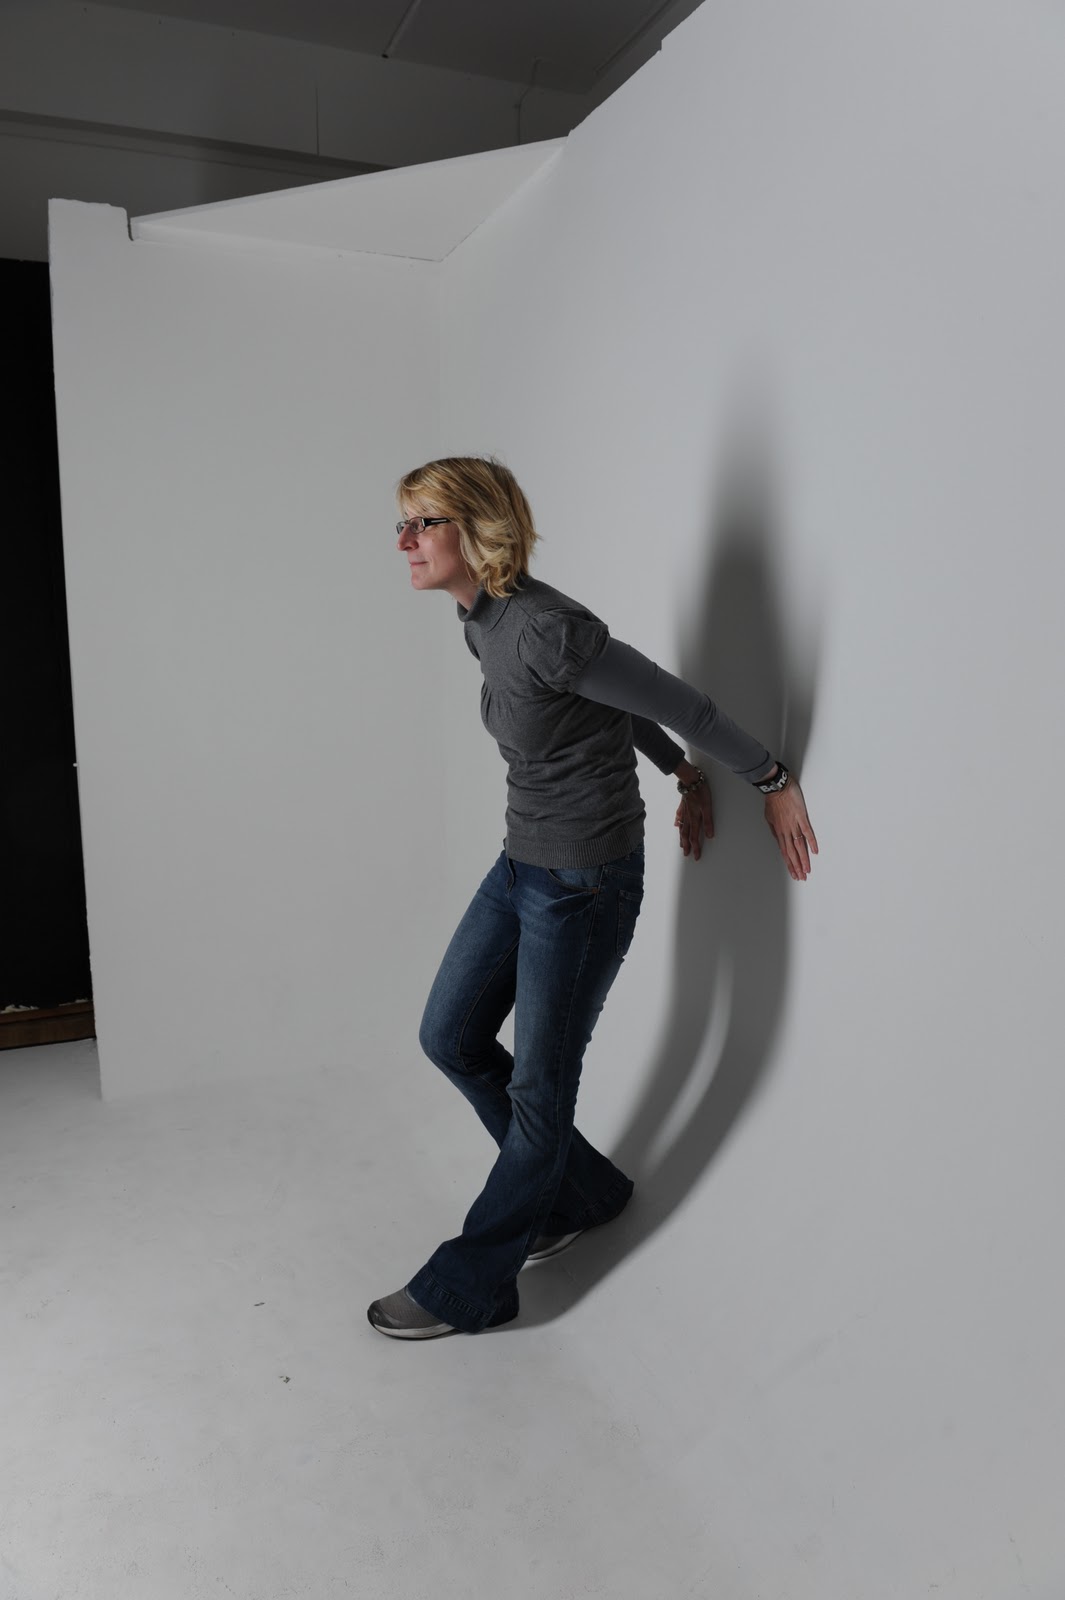
'Skin portrait'
The photo was produced using film that was cross processed with colour negative chemistry to boost the contrast. The image was produced using a single light with a soft box, placed directly in front of the subject. The highlights on her arms are the result of light bouncing off the ceiling and off the wall she is leaning on. Her dark skin accents this. What I find interesting is the use of a curved slopping background that produces a significant curving effect that is enhanced by the slight shadow cast upon it. The subject looks as though she is about to take off and has a determined expression in her face. The tone of her skin has produced startling contrast against the white background. The use of the black and white clothing has also exaggerated this, producing a dramatic effect. The trousers are super wide and cover the shoes so that the subject's feet nearly vanish into the floor. The image looks over exposed as the contrast has been boosted post production. The following lighting plan was used:

The re-created image was shot at the college studio using the following equipment:
- Nikon 700
- Single Bowens flash head
- Large rectangular soft box
- Sekonic lightmeter
- Interfit IR trigger
- Fixed solid and curved backdrop
- Post production - lightroom 3 and photoshop CS5
The bowens head was attached to the ceiling by a extendable rig. This was moved in accordance with the health and safety requirements of the college (The rig was moved by the Tutor when required). The camera was securely fixed to the mobile stand, as instructed by the tutor.
Step 1 - set up

The image above picture shows the set up that was used to create the shot. The camera was positioned on the stand on the right hand side of the set which enable me to shoot at an otherwise impossible angle.
Step 2 - The addition of the model

Maggie very kindly offered to pose for me. I directed her to adopt the pose of the model in the original photograph. Once in a suitable pose, I metered her using my sekonic flash meter. The chosen camera settings for metering were a shutter speed of 1/60 and an ISO of 200. It took a number of measurements to get the desired image as the original image looks over exposed. The following images were taken to achieve the desired effect:


F 7.1 F 8.0 F 3.5
The final choice of aperture setting was f 3.5, because it produced the slightly over exposed effect that was essential for the picture.
Post production
The f 3.5 image was imported into photoshop, where I cloned in the white background to produce a seamless effect and added some noise using the addition of a filter:

I then used adjusted the curves to create the extreme over exposed look to match the original photo situated on the right of the screen:

The final image:

The original image:

Reflection:
There were obvious restrictions on what I could achieve with this project, the most obvious being the look of the model. My model had a significantly different look to that of 'Skin', however, what I have tried to do is re create the look of the picture that Dave Willis produced by using the correct lighting set up, correct use of equipment and the use of post production tools.
Because the model was different and I didn't have to option to use the same clothing, the size and shape of the shadow is different and my image doesn't have the startling 'burnt out' look with skin's trousers.
Hi
ReplyDeleteAs we discussed a great example of a blog entry containing not only research but examples of the style and your version of it. Good screen grabs as well to accompany this work.
You are comparing your work to the work of others which will raise the level of what you produce. The label tracking is also very well done and focussed to task.
Steve
Hi
ReplyDeleteGood use of labels to track your work will allow you to achieve a higher grade. The criteria are vital to get right and allow you to target the missing ones. This will fit alongside your work and you will be able to really focus your work.
Steve